
Timecode Fader Automate
Generate precise fader automation tracks from value tables, enabling seamless integration with grandMA lighting desks.
Core Capabilities
Section titled “Core Capabilities”- Convert Values to Fade Move Events
Automate fader movements using predefined value sequences. - Visualize Complex Movements
Create fader automation to visualize complex stage movements or control kinetic objects. This feature ensures compatibility with other time-based systems, such as stage automation controllers. - Design Organic Effects
Convert detailed value data, like externally analyzed audio files, into smooth and natural-looking fader movements.
This feature helps create effects that would be challenging to achieve with traditional lighting consoles.
Step-by-Step
Section titled “Step-by-Step”- Create Values:
- Create a data table in Excel (or your preferred software) with three fields: a Timecode field for timing information, a Value field for the specified values, and a Track field to designate track numbers. Use the Track field format “Page.Executor” (like “1.4”) to assign the movement directly to a specific fader.
- Import Values:
- Configure your preferred import settings.
Before importing CSV files, you can configure the CSV format in the Settings page. If you’re unsure about the format, open the CSV file in a text editor to check its first line. - Use Import File to import data from the Comma-Separated Values file (.csv). Alternatively, use Import Clipboard to paste data from applications such as Excel.
- Configure your preferred import settings.
- Setup Export Parameters:
- Configure the destination timecode number and name.
- Choose a fader type:
Master: Creates only Master Intensity movements
Temp: Creates Temp movements and adds On/Off events for proper behavior
- Export Timecode and Sequence:
- For manual import: Export the generated Macro and Timecode to a grandMA2 folder.
- Start automatic import: Send the generated Sequence and Timecode straight to the console.
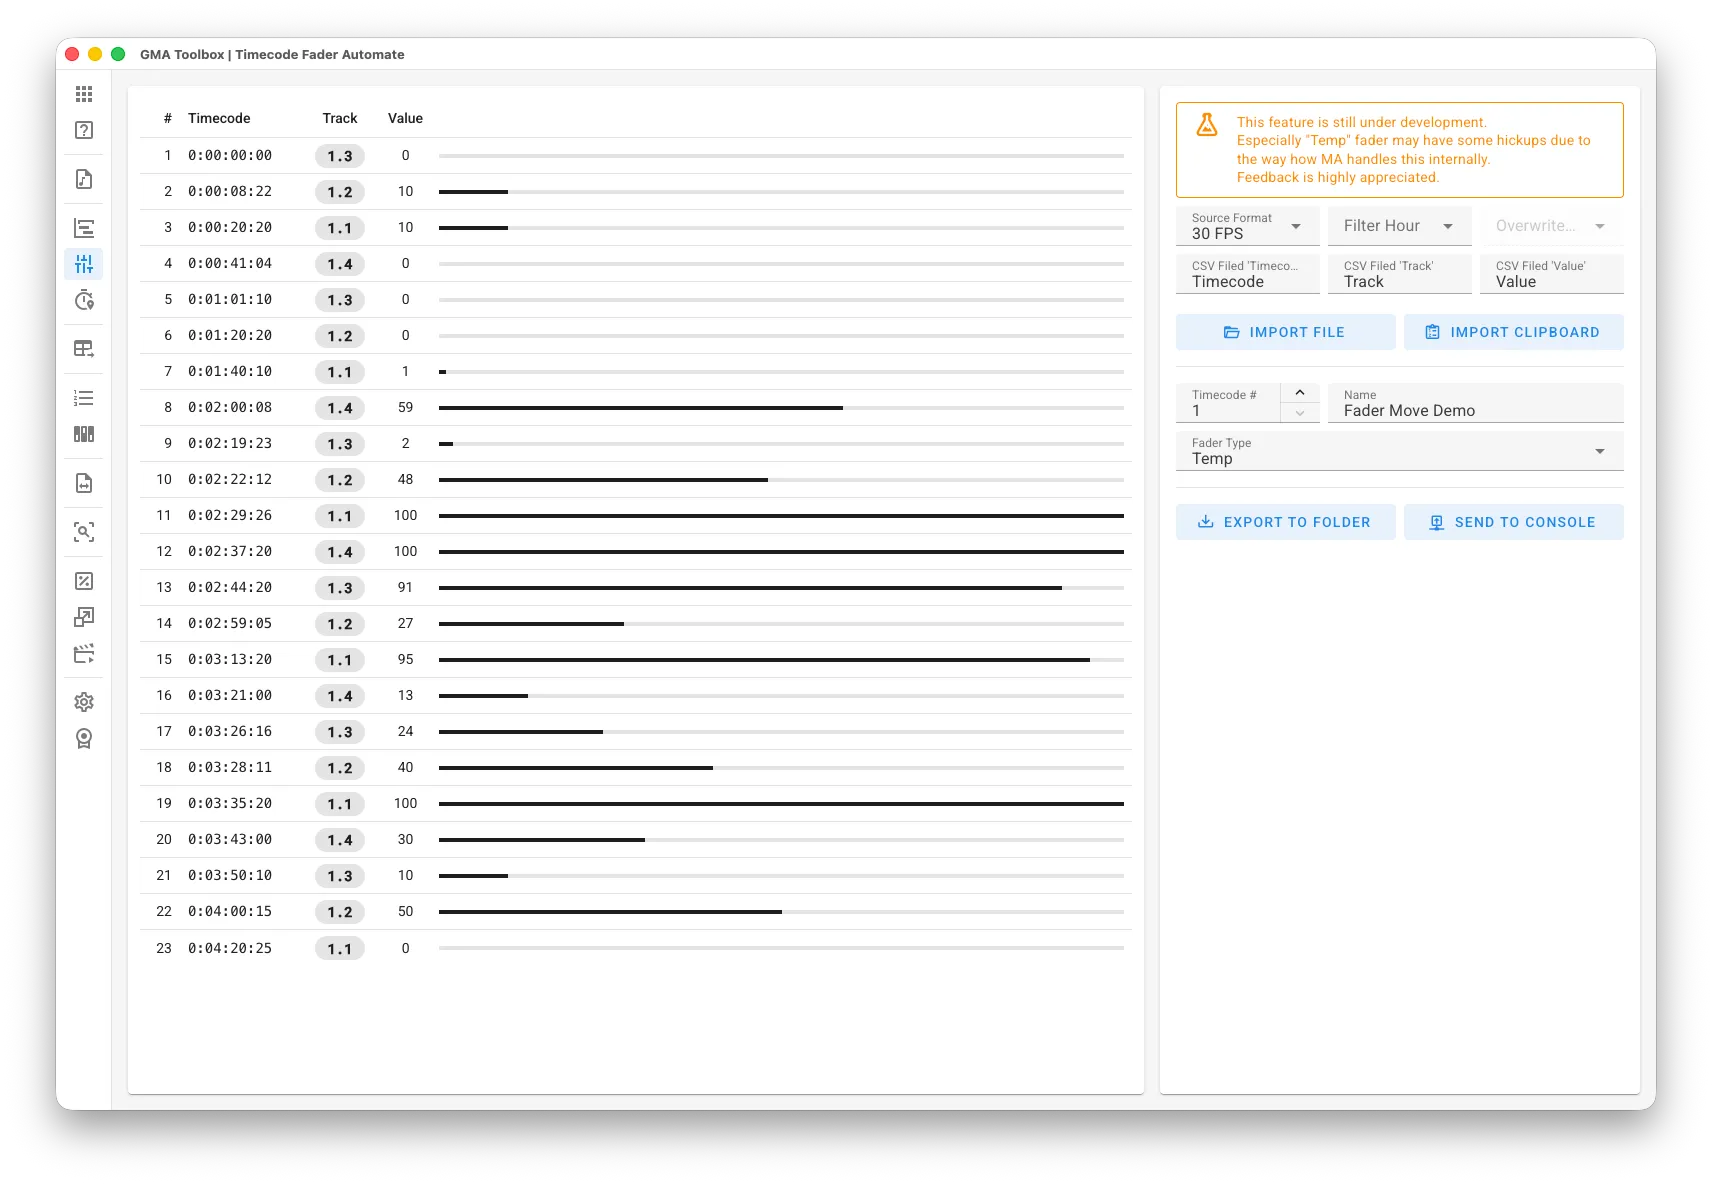
User Interface
Section titled “User Interface”Import Options
Section titled “Import Options”- Source Format: Choose the timecode format for input and export.
- Filter Hour: Select markers from a specific hour range and optionally modify the hour value.
- CSV Field ‘Timecode’: Choose the column name containing timecode values.
Format must be “HH:MM:SS:FF”. - CSV Field ‘Track’: Choose the column name containing track assignments.
Format must be “Page.Executor” (example: “1.4”). - CSV Field ‘Value’: Choose the column name containing fader values.
Values must be between 0 and 100.
Destination Configuration
Section titled “Destination Configuration”- Name: Define the name for the timecode object.
- Timecode #: Set the target timecode pool number.
- Fader Type: Choose a fader type:
Master: Creates only Master Intensity movements
Temp: Creates Temp movements and adds On/Off events for proper behavior
Table Fields
Section titled “Table Fields”- #: The sequential row number used for reference.
- Timecode: The specific time point when the value should be applied.
- Track: The designated target executor.
- Value: The numerical value to be applied at the specified timecode.